Table of Contents
With renting ski or snowboard gear, a point at which most beginners start, there is never any need for regular cleaning and maintenance. However, when skiers and snowboarders finally own their ski sets, gear, and every other thing that goes with skiing or snowboarding, there is a need for proper maintenance. Buying such gear is an expensive investment, therefore, giving them proper care is the only way you will keep them serving you longer and in their best condition.
Ski and snowboard gear need both in-season and off-season maintenance. While in the latter you will be servicing them to keep them in a good condition for a long while, in-season maintenance is important to maintain their performance through the season.
There is no denying that it is a good idea to have a designated area within the house or your garage which you have set for keeping your gear not only for proper storage but also for quick and easy access. Beyond this, here is how to keep your gear’s top performance through the season.
1. Boots

As you glide through snow, your feet sweat and sometimes moisture from the outside environment penetrates through to the inside. If this is not taken care of, one ends up wearing damp shoes each day and sooner than later, mold starts to grow. Rule of thumb is to ensure that your boots are always thoroughly dry before putting them on.
After every skiing/snowboarding session
- Scrap off the snow from your boots.
- Remove the liners and hand wash them with cold water and a mild detergent.
- Lay them out to dry completely before you can put them back inside the boots.
- Use a damp cloth to wipe your boots on the inside and let them dry. For ski boots, the outer shell is made of plastic, therefore, it is easy to clean it by simply wiping dirt off with a damp cloth. This same process applies to snowboard boots whose outer shell is made of leather, rubber, or synthetic materials to make them more flexible.
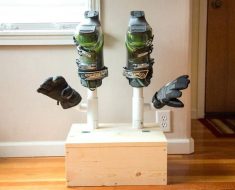
- If in a hurry, a good boot dryer will come in handy.
- Put back the liners and buckle your boots loosely, ready for your next skiing session. Not buckling your boots will cause their shell to deform and not fit well the next time you will be wearing them.
- In addition, check for dents and damages that could have been caused by the binding or objects on the trail. The sooner they can be repaired the better because taking longer to fix them affects your boots performance.
- Since ski boots are typically more rigid compared to snowboard boots, some skiers prefer to use a flexible boot sole guard to improve the flexibility of their ski boots. If this is the case, remember to take out and clean the sole guards along with the boot liners.
Handy Tip: Always wear dry socks inside your boots to keep your boots dry.
2. Bindings

Some skiers and snowboarders assume that after having a professional install them, bindings will not need any further maintenance. Bindings may not need much maintenance compared to other gear, but they sure need a regular checkup. Aside from the initial installation when you first purchase your bindings, you need to have a regular maintenance plan for them.
- After each session, check your bindings for damaged or loose parts. Parts like the anti-friction element can be replaced with another quite easily, which allows you to continue using your bindings. Also, check its base and sides and ensure that they are not rusted or scratched.
- Your bindings only need to be wiped well after every use to remove dirt. Thereafter, let them drain out all fluid overnight. If you notice grime or dirt on the hard to reach areas, an old toothbrush will do the trick.
- Once dry, spray your boots at their contact points with the bindings together with the bindings with a silicon binding lubricant.
- In case you have to change your boots or ski for one reason or another (as this may happen), check that they are compatible and that the mounting has been done properly before hitting the trail.
- Occasionally, you may find one or two stubborn screws when unmounting your ski or snowboard bindings. This could be as a result of the epoxy that was used on the holes during installation. Try heating the screw a little with the tip of solder wire to melt the epoxy then take it off using a screwdriver.
- Invest in a good binding cover so that as you travel from place to place, they will not accumulate grime. If not, improvise the covers by cutting out the sleeves of your old nylon jacket. Use a sleeve for each binding and fasten the ends with rubber bands.
Ski Bindings Maintenance
Apart from the seasonal ski binding maintenance at the professional ski technician, here are some steps you can take to keep your bindings performing at their best through the season.
- Before mounting your ski bindings back on your board, you could spray a little Tognar glue in the screw holes. This protects the holes from rust so that it will be easy for you to unscrew when separating the binding from the ski.
- Knowing your DIN release force setting is important. It helps you get your bindings set correctly. If your bindings do not release as expected, you need to take them to a technician for resetting. At this point, it is important to note that the DIN setting job is best left to the professional. If you will have to undo the settings to give your ski bindings springs a break, as some put it, be sure that before your next ski session, you have them set correctly. However, this should be more of seasonal maintenance.
- Damaged screw holes on your ski, whether you are remounting your bindings on your old ski or mounting them on a new ski, will require that you use screw hole inserts or fill the holes and drill new ones a few centimeters from the old ones. If it’s just one or two screw holes damaged (if it’s wood), then simply put some epoxy inside the damaged holes and mount your bindings.
- If you are using a ski with a metal top skin tap the screw holes of your bindings to allow the screws to install with ease through the metal layers and the mounting plate in the inside. In addition, spray your screw holes to protect them from corrosion and to lubricate your screws for easy mounting.
Snowboard bindings maintenance
Much as the maintenance processes of ski and snowboard bindings are more or less the same, here are a few points specific to keeping your snowboard bindings in tip-top performance during winter.
- Loose screws seem to be a common problem in bindings. For loose screws on your snowboard bindings, a quick tip is to fill up the threads of your screws with polish or scraped wax as a binding agent. Alternatively, stick a tape with adhesive on both sides at the bottom of your bindings then screw them on your board. This helps secure your bindings so that they don’t keep shifting and eventually loosening the screws and damaging the top sheet of your snowboard.
- If your screws are the type that are concealed under your binding’s sole plate, be sure to remove this plate and confirm that they are tight enough before hitting the snow.
- If you happen to lose some nuts or bolts from your bindings while on the trail, the wire wickets of your lift ticket can be your savior before heading down to the repair shop. However, if you remembered to carry some spare nuts and bolts, place them on the unused holes in your binding straps. This way, you will easily access them when you need them.
- Hard carving needs thick 6-mm diameter balls. The idea here is to know your style and where you will be racing, and then install the right balls for your bindings.
Handy Tip: Always try to tighten your screws in an alternating pattern i.e. once you have tightened the first screw, tighten the opposite screw and the rest in that order.
3. Snowboard / skis

Ideally, skis and snowboards should be tuned every three weeks for them to deliver a top performance. Spring skiers and snowboarders, on the other hand, should get their boards/ skis tuned for skiing or snowboarding in wet conditions and waxed for spring temperature. In addition to tuning, here is how to care for your board/ski in-season.
- Using a cloth, wipe off the water melting out of the snow from the edges and the base of your ski /board. While doing this, place its tip on a surface and its tail to the floor so that your board/ski stays in a slanted position.
- Check the edges of your ski/board by running a finger down each side. If you notice some roughness or scratches, smooth out the edges with a diamond stone or a pocket stone.
- Waxing your skis and boards should be done on demand. The trick is to be able to know just when to do the waxing. If your skiing or snowboarding on extremely cold snow conditions, be prepared to wax your boards/skis more often (at least every 3-4 days or after three trips) with hot wax. If a colored base starts fading off and a black base starts turning grey, know that it is time to do some waxing.
- To wax your board/ski, scrape off the old layer of wax.
- Using an iron box, slightly warm the new wax that you intend to apply.
- Once the wax is melted and has formed a pool on the board/ski, spread evenly it with the iron on top of the board/ski.
- After you are sure the wax is evenly spread, scrape off any uneven bumps then use a scotch pad to make it smooth.
- Sometimes, in the process of removing the dirt and debris caught in between your snowboard/ski, you end up gouging even the wax you recently applied. In this case, there is no point of waxing the entire surface. Simply use the process above to wax only the affected area.
- If you are fond of hard ice terrain, your board/ski may need more frequent sharpening compared to when skiing or snowboarding on groomed powder. On average, you may need to sharpen your ski/board edges at least on a weekly basis to keep it in a tip-top condition at all times. Consider that frequent sharpening degrades it a bit so only do the sharpening when it is absolutely necessary. You may opt to sharpen it on your own using a file and a sharpening stone or take it to a dealer for sharpening with a machine.
- In case of big damages like holes that reveal the core of the board/ski, you may consider getting a rental unit in its place or taking it to a dealer for repair, if this is possible.
Once you have a snowboard or skis, it only makes sense to invest in a good tuning kit. A tuning kit comes with the following items:
- Waxing iron
- Wax
- Scotch pad
- Brass brush
- Sponge
- Nylon brush
- Tune
- Edging tool
- Edge rubber
- Marker pen
- P-tex Candle
- Base file
- Metal scraper
Handy Tip: Invest in a bag and always transport your ski/snowboard inside the vehicle to keep it from damage especially at the tip, the tail, and the edges. When storing it, do not place it on the ground. Rather, suspend it from the wall or place it on a skateboard rack if you have one.
4. Ski and snowboard outerwear

With snowboarding or skiing gear, always check for signs of wearing out of their waterproofing properties. Aside from this, you need to clean and dry them well and you will be good to go. However, cleaning depends a great deal on the material that your apparel is made of.
Ski/snowboard jackets. Apart from being washed and dried well, jackets need to be re-waterproofed from time to time.
- Wash your jacket gently in with cold water and the appropriate cleaner.
- Rinse two or three times until you have gotten rid of all the cleaner.
- Re-waterproof your jacket using a waterproofing solution particularly if it is made of synthetic or Gore-Tex material. This solution is equally good for your base layers, the soft shell, and down jacket.
Handy tip: Never use ordinary detergents for washing your ski/snowboarding outerwear since they tend to strip it off the water repellent layer. It is always good to pay keen attention to the manufacturer’s guideline on machine washing or hand washing.
Wetsuits. Simply wash with cold water and hang under a shade to dry. Vests should be treated the same way. Water treated with chlorine isn’t the best for your wetsuit as it is bound to wear it out faster.
How to maintain different types of fabrics
Gore-Tex. Gore-Tex jackets are usually lined with a durable water repellent (DWR) layer. Dirt will affect this layer. Wash dirt off your Gore-Tex gear with the right cleaner and rinse it off with a waterproofing solution. If machine washing, follow the instruction of the manufacturer on its label. Hang it under a shade and not in direct sunlight as this will damage it over time. Remember not to apply the waterproofing treatment everytime you wash your apparel. Do this once in a while when your ski jacket loses its waterproofing ability.
Down. Down layers are usually a little delicate. Nevertheless, it is still important to keep them clean and well maintained for them to retain their insulating ability. Wash your down layer normally with cold water with down cleanser and then rinse it off without wringing. Hang it under the shade to dry. If using a dryer, set it on the lowest temperature setting.
Synthetic layer. Synthetic layers need handwashing. Make sure you use a cleaner fit for washing the layer and rinse it thoroughly before laying it out in the shade to dry.
5. Gloves/Mittens

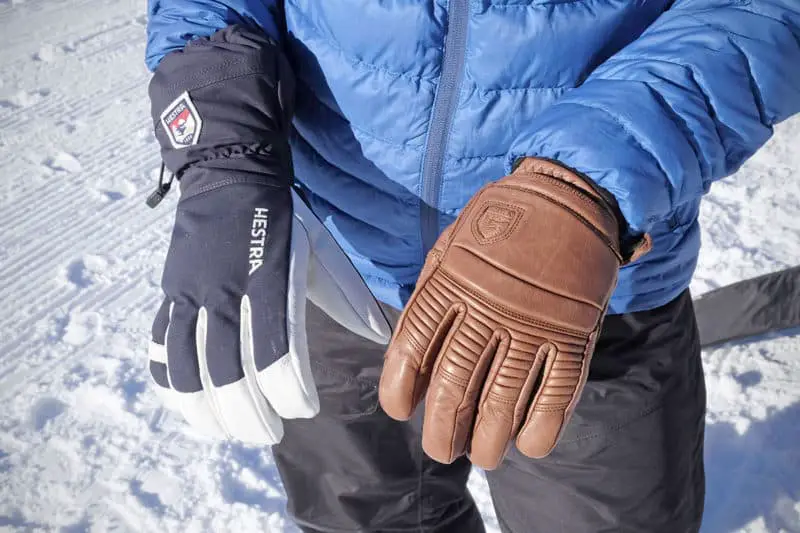
Gloves are apparently the dirtiest outerwear since they are worn in the hands, which handles every other thing. If your gloves have a DWR treatment, then they need to be washed same way as the jacket and accorded a waterproofing treatment if necessary.
- First, take out the liners from your gloves, wash and hang them the normal way.
- If your gloves are made of leather, use a leather cleaning solution to wipe them.
- Otherwise, wash your gloves with water and the same cleanser you used for your ski jackets.
- Squeeze them gently and hang them out to dry.
- If machine washing, use warm water on a gentle cycle.
Leather gloves. Never machine wash leather gloves. Wipe off dirt with a damp cloth then spray them with a leather cleaner, making sure you are spraying only parts that are leather, then finish by wiping it dry. Once dry, wax them or apply leather conditioner to give them quality finish.
Cotton gloves. Cotton gloves can easily be washed by hand or in a washing machine then air-dry them.
Woolen gloves. Hand wash or machine wash wool and dry in under a shade. Handle it gently to prevent it from stretching or shrinking.
Silk gloves. Silk is warm and cozy, hence an excellent option for gloves liners. Wash your silk liners with lukewarm water and mild detergent. Rinse with cold water and lay them out to dry.
Thinsulate gloves. Best for extreme weather, Thinsulate gloves are best cleaned by soaking them and lightly kneading them in lukewarm water with a little detergent and then rinse off in plenty of water. Repeat this process until the gloves are clean without any stain. Wring them inside a towel gently, for the towel to absorb the excess water. Dry them on a rack under a shade. Never twist, squeeze or wring them directly.
Suede gloves. Suede gloves are better cleaned at the dealer’s store. However, spray it regularly with a suede spray and you will be good to go.
Handy Tip: To clean gloves easily and effectively, wash them while wearing them in your hands and invert them when you have to wash the inside. Secondly, avoid using bleach or softeners when washing your gloves. They will damage the material in the long run.
6. Goggles

As you ski/snowboard, googles are bound to get sticky with sweat. While it is so easy and very convenient to wipe them off with the nearest cotton cloth, this isn’t the proper way to clean them. Use a lens cloth moistened with a lens cleaning solution to wipe them then store them in their bag.
If your pair of goggles has a waterproof layer, wait until they are completely dry then use a soft dry cloth to wipe the inside of the lens.
Handy tip: It is good to have an anti-fog spray that you can use when you decide to wash your goggles and you need to clean the lenses well.
7. Helmet

- Your helmet should be the easiest to clean and maintain during the season. After each session, take out the liner from the inside, wash it with water and mild soap and then dry it separately.
- Next, take a cloth and wipe your helmet both on the inside and outside making sure that it is completely dry before keeping it away for your next use.
- Use a toothbrush to unblock vents for effective ventilation.
- Always store it in its protective cover when not in use.
Handy tip: As you clean your helmet, don’t forget to clean its visor. Cleaning dirt immediately helps you remove it easily without having to scrub or scrape it off which reduces its chances of scratching.
Some handling tips
- When traveling, wrap or stuff the tips of your boards/skis with clothes soft fabric like a sleeping bag so they are not chipped off. You never know how well or bad your gear bag will be handled with attendants during your travel.
- The only other way, apart from proper care and maintenance, that your gear will last longer, is when used as they are supposed to. They should never double up as tools for other tasks.
- Ski and snowboard bags are best for travel and not for summer storage. Moisture trapped inside the bag has and will never give your gear a good environment. They will deteriorate instead.
- It is not enough to store your gear in the garage. Invest in a rack for your gear, particularly the ski poles and the boards, to be stored safely. Racks are the most suitable organizers for your boots and other footgear.
- Ice skates are not only a hazard when kept on the floor, but they may also get easily damaged. If your rack does not have hooks, purchase hooks separately for storing them.
- When washing outwear, it is better to first treat any stain on the fabric.
- Pair up your gloves and mittens and store them inside a storage bin. Here they are easily accessible by every member of the family including kids.
Conclusion
It is said that how well your gear will serve you depends on how well you will care and maintain them. Ski and snowboard gear maintenance is not just a summertime affair but also a through-winter affair. Secondly, it is advisable to use, care, and maintain your gear as directed by the manufacturer. Everything has its limits, going beyond this only shortens their lifespan. A little caution during their use is as important as cleaning and maintaining them.


